Using the Custom CSS App
Table of Contents
Overview
The Custom CSS app aims to be a simple, yet powerful CSS editor for your website. It gives you visual controls that let you edit the look and feel of your website in real-time, and is brilliant for making visual changes to your website that aren't offered in the site customiser.
It's a site editing experience that will suit both beginners and advanced users alike. Beginners will love the simple visual controls and live preview. Advanced users will love the code autocompletion that makes writing CSS faster than ever.
Features
Inspector
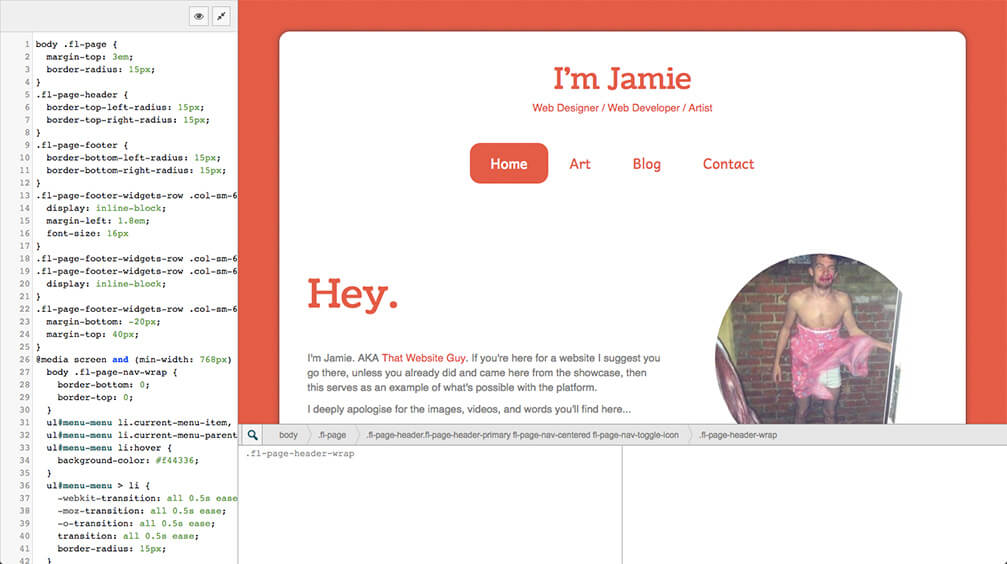
The hardest part of editing your site's design using CSS is usually finding the correct selector to use. The powerful built-in inspector makes this easy. While viewing a full preview of your website, just click on an element and it'll help you identify the best selector to use to target that element.
The Inspector will help you even if you have no idea what a CSS selector is.
Visual Editor
Don't like playing around with code? No problem. The Custom CSS app has a set of simple controls that make it easy to choose colours, styles, and measurements. Combined with the Inspector, you'll be able to make changes easily in just a few clicks without needing to write a single line of CSS code yourself.
CSS Editor
The Custom CSS app has a powerful CSS editor. It has autocompletion for both CSS selectors and attributes. It also features very useful CSS linting that'll help you identify issues in your code before you publish your changes.
Setup & Usage
Once you've activated the Custom CSS app from the "Apps" menu in your admin panel you'll find a new submenu item under the "Appearance" menu called "Custom CSS".
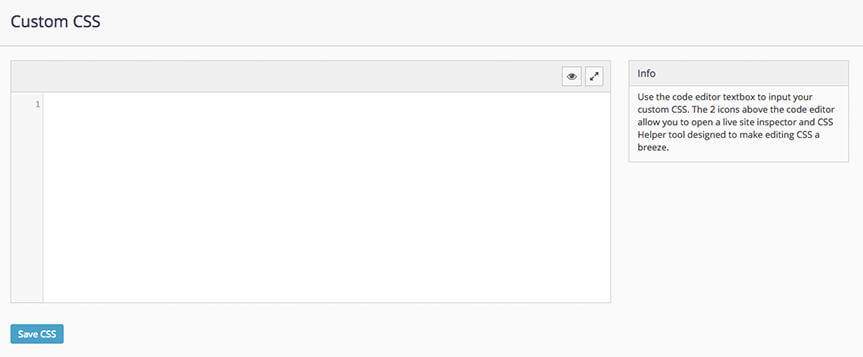
This is what the Custom CSS interface looks like when you first get started. It’s fairly blank with your main CSS editor on the left taking up most of the screen.
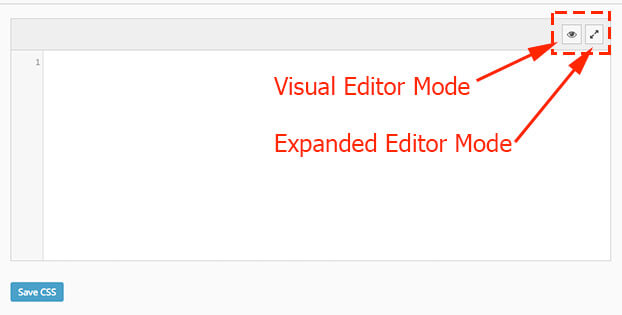
The editor has two buttons in the toolbar. These buttons are for the "Visual Editor" mode and the "Expanded Editor" mode. We’ll start by looking at the visual editor mode. This mode is where most beginners will want to get started.
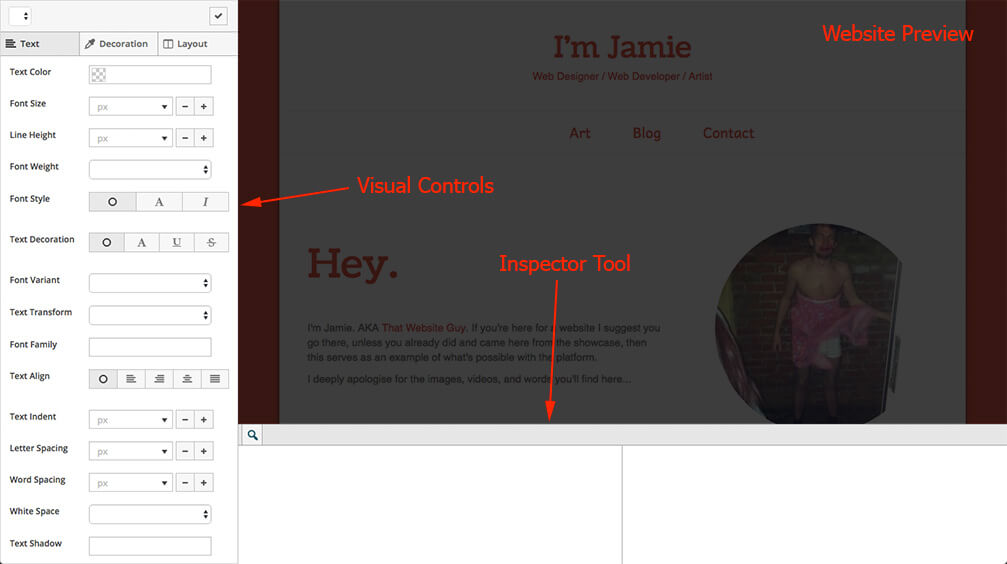
So here, you’ll notice we have a live preview of our site. On the left, we have the visual controls and along the bottom we have the inspector tool.
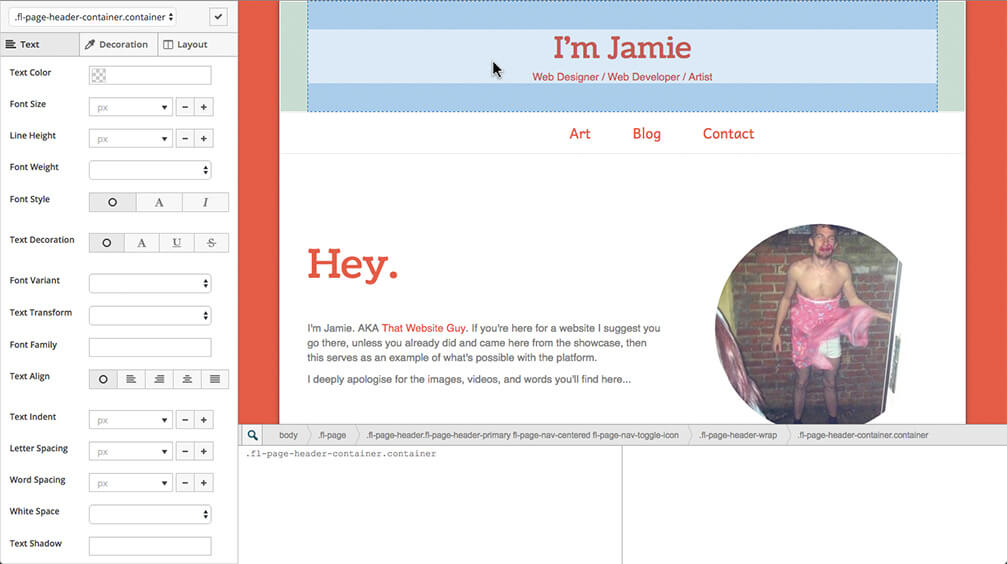
This inspector is the same tool that you’ll use in both the Visual Controls and Expanded Controls (or code) modes. When you hover over an element in your site preview, the inspector will highlight it, giving you some indication of what that element is.
Clicking on the element will select it in the inspector. From here, you can view a hierarchy of the elements that contain the selected element. Hovering over the hierarchy will highlight the parent element. Clicking on an element will select it.
Underneath the hierarchy, you’ll see a set of selectors that can be used to target the selected element. It displays the most specific selector at the top and the less specific ones below that. Hovering over any of these selectors will highlight all elements targeted by this selector.
For example, the heading of our example website is a span tag targeted by .fl-logo-text, but it’s also targeted by the more general selector span. So you can choose the selector that targets either the single element or the group of elements you’re after. Most of the time, you’ll be interested in the top selector, which the visual editor automatically selects for you when you click on an element.
So let’s take a look at the visual controls down the left-hand side. They’re separated into text, decoration and layout controls. The visual controller will target the selectors that you have selected up at the top of the screen. Any changes you make will reflect in real time so you can refine the changes you’re making.
If you’re already familiar with CSS, then you can take advantage of the expanded mode. This mode gives you a full preview of your site with the CSS editor on the left. This editor automatically scans your site to find any important selectors and makes them available through the editor's auto-completion feature. Or you can use the inspector to add new selectors or attributes to your code.
When you’re done, simply click the "Save CSS" button and your changes will be instantly reflected on your site.
Note: If you have the Performance app active, you may need to clear your cache before your changes are reflected.

